Fishing rod Wrapping
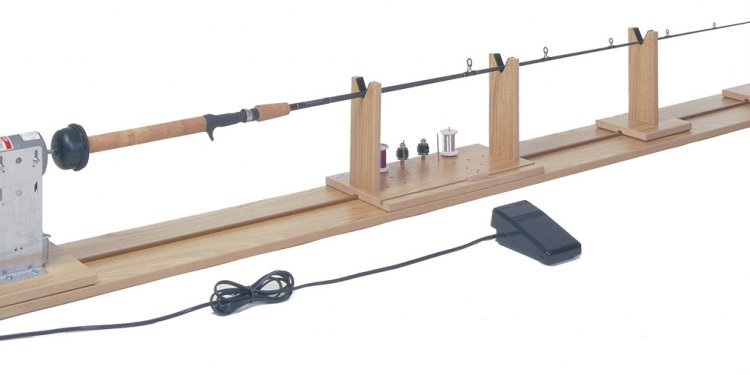
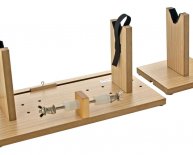
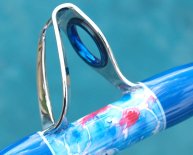
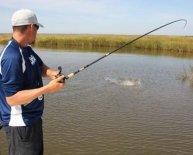
This is a guide on building and custom-wrapping a fly fishing rod the average person. Start with picking a rod blank. Factors are group ( freshwater or saltwater ), kind ( conventional{baitcaster} or spinner ), size ( lengthy or brief, thin or thick), and material (solid fiberglass, wrapped glass, graphite, etc.). Color is not actually one factor since the blank can be coated any shade. The next step is to choose the handle, grip, and reel chair. All three of the choices will be determined by the particular pole and it is function. Freshwater rods belong to 2 catergories handle and grip-wise, pistol-grips(usually made of molded hard plastic) and wood, cork, or foam-rubber manages, and lumber, cork, or foam-rubber grips. Saltwater rods can not only have lumber, cork, or foam rubber handles and grips, but also aluminum butts (or handles). Having selected the afore-mentioned items the next phase is application. After applying epoxy glue on location on base of the blank where the handle are going to be, slip the handle along the pole towards the bottom associated with the pole. Presuming the handle opening according towards the diameter of blank is close, resulting in a strong fit (if it's too loose wrap 1/2" hiding tape spaced 1/4" apart under the handle initially till a strong fit is aquired before you apply epoxy), then the next thing is setting up the reel seat. This process is a repeat regarding the handle installation, checking for tightness of fit very first, after that using epoxy. Whenever applying the epoxy from the blank, make sure you fill areas between tape around ensure correct adhesian for the handle or reel chair. The next phase is setting up the hold. First search for rigidity to ascertain if opening when you look at the grip has to be reamed away or not. For foam rubber, reaming is not required as after using epoxy (through the point where in actuality the hold quickly slides down to) down the rod towards the reel seat, the foam-rubber will (with a little force) fall down to the reel chair. Wipe-off straight away any extra epoxy! For wooden or cork grips, wrap some sandpaper around a rod (smaller than the hole diameter becoming reamed out) and place in a drill and work this back and forth before the desired dimensions are reached. Then apply epoxy and slide into destination. Next the guides must certanly be selected. Once more this is determined by the kind and intent behind the rod. Rotating rods guides tend to be descinding in size ( aided by the first guide ranging in dimensions from 2'' in diameter, to 3/4" in diameter (plus in a descinding purchase to the tip associated with the pole) on tiniest guide (beside the tip) 1/2" in diameter, to 1/4"in diameter. There are many types of guides ( metallic Hardeloy[we recommend], stainless, material with various inserts, and roller guides. In most cases of flash guide placement goes the following: the initial and largest(due to the fact case may be) is put 18"-21" from middle associated with reel chair. Then gauge the remaining portion of the pole length and divide the actual quantity of guides left into that amount and put all of them in a descinding spacing structure of each next space becoming 1" less apart than the last space had been.Mark these placements on the rod with chalk. The next phase is the underwraps. Wrap in a taut wrap (no areas) 1st 4"-8" of the pole over the hold. that is known as the butt place. After that where formerly marked, (for the guide opportunities) cover another tight place at least 1" longer than each guide to their respective marked places. At this time choose and put in the end with epoxy just like the various other elements (just difference is thread is employed to furr out of the pole tip in the event of this requisite). The tip should deal with up on the same part because the reel sits. Wrap a super taut place 1" within tip. The next phase is to cover the guides. Place the guide in the middle of the underwrap, and tape 1 region of the guide tightly. Reduce a bit of thread 7" lengthy and fold in half. This will serve as your loop thread that is used to pull the finishes of one's place straight back in thread upon completion. The bond colors have reached the descretion associated with creator or owner. Start by wrapping the thread over it self to get itself making 2"in the course associated with the guide.After 4 wraps cut the extra 2" of starting bond off and carry on wrapping even-up across guide base until 1/4" through the back of base. Then position the loop 1" extending beyond the place and continue wrapping to your straight back associated with the base. Keeping the thread place down to you finger, cut the thread making 2"-3" and pull through the loop. While still keeping the wrap tight, pull the cycle (because of the end associated with bond through it) until the end associated with thread is tucked underneath the final 1/4" of wrap and out the other side where it's after that trimmed down with an exacto blade. This exact same process is duplicated on the other hand of the guide and all sorts of all of those other various other guides and tip. The band place can involve a variety of configurations. The basic premise goes like this; on the same side of the rod as the reel will sit, starting at the grip end, in a straight line, make marks consecutively 1" apart with chalk. Tape one end associated with the bond down and begin overall the rod spiraling inside appropriate spacing so the thread lands for each marked area consecutively towards the top of musical organization and once again as it descinds back. Upon achieving the base, cover two times around in which the start of the tape ended up being initially taped and start support laying the thread directly beside (and tight as you can) the first upward spiral place and back off once again. The following travel will layed on the reverse side of the starting up spiral place and back. This action is duplicated intil the dsired design is achieved therefore the end is taped down at base. Begin wrapping an everyday tight wrap 1/4" out of the tape at the base before tape is reached. Tape over that 1/4" of wrap and slice the bond that started the butt wrap originally and all sorts of regarding the wraps which can be beyond the taped up 1/4" wrap(maybe not the underwrap). Holding the place tight take away the tape keeping the 1/4" of place off and finish overall toward grip recalling to utilize the loop to pull the conclusion back through and cutting the extra. Employ bond perservative with a paint brush and wipe-off extra. Wait 4 hours till the thread preservative dries. Using the lowest rpm engine (6-7rpms) spin rod while applying rod finish with a paint brush. Saturate whole pole (from where in fact the thread begins within butt wrap to the tip) coating the empty in addition to thread wrappings(not the guides). While nevertheless rotating, make use of a torch (set real low) to pop the bubbles and erase the rod finish.This component needs some prior experience ( in regards as to how near keep the flame and exactly how lengthy and can incorporate practice) to get it done appropriate! Wait 24 hrs. Trim any projections and recoat the guides only with the exact same treatment as before. Wait 24hrs. Congratulations, yuo, ve built very first pole! Love! .Custom-artfishingrods...
Share this article
Related Posts
Latest Posts


